
This guide will show you how to configure or reconfigure Evolution for Office 365 Exchange.
Step 1
Download Evolution (Skip this step if SDU-IT installed your computer)
Download Evolution by running the following commands in this specific order:
sudo apt-get update
sudo apt-get install evolution
sudo apt-get install evolution-ews
Step 2
Setup Mail and Calendar
Open Evolution and add your SDU account. Once ran for the first time the Welcome “Wizard” will guide you through the process. If you want to add another account to Evolution:
Edit → Preferences → Mail Accounts → Add
If Evolution has already been setup and configured to NONE Office365 and you would like reconfigure the account please skip to step "Configure already setup Evolution with Office365"
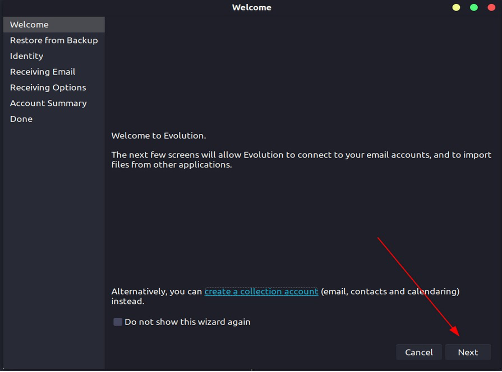
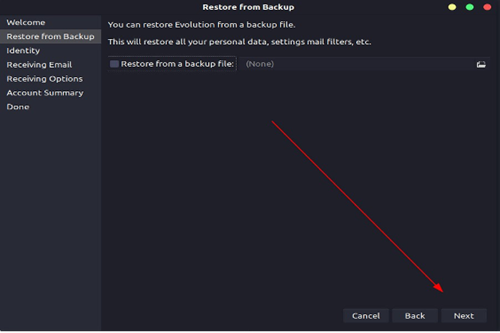
Click “Next” to advance in the following two windows.
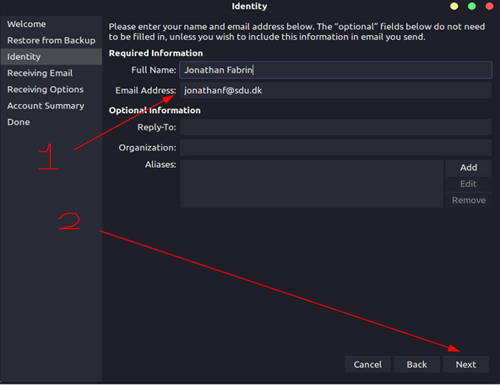
Please enter your full SDU E-mail address as shown in the image below
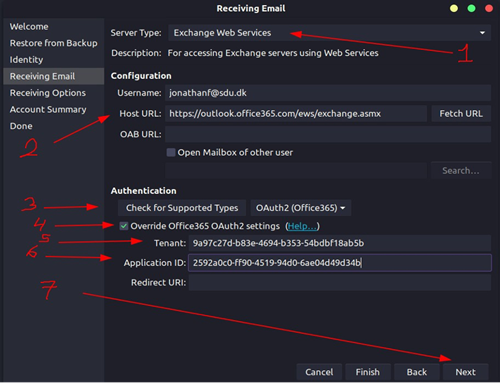
Fill out the following fields with the corresponding information:
• Server Type → Exchange Web Services
• Host URL → https://outlook.office365.com/ews/exchange.asmx
• Authentication type → OAuth2(Office365)
• Override Office365 OAuth2 settings → √
• Tenant → 9a97c27d-b83e-4694-b353-54bdbf18ab5b
• Application ID → 2592a0c0-ff90-4519-94d0-6ae04d49d34b
• Redirect URI → Leave blank
When done click “Next”
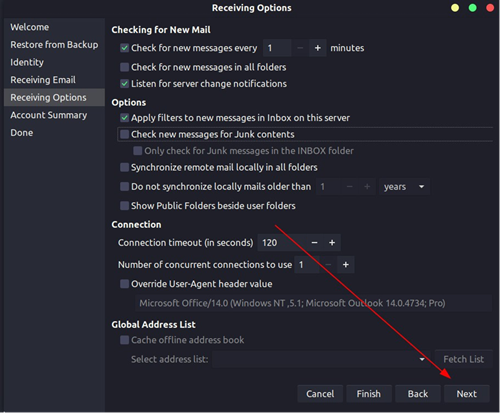
Change the default “60 minutes” to 1 minute(s). (It is really up to you)
Click “Next”
Verify that your name and E-mail looks correct. You can name the Mail account something specific under the “Name” tab. By default it will be your mail address.
Click “Next” when done.

Click “Apply” to finish the setup wizard.
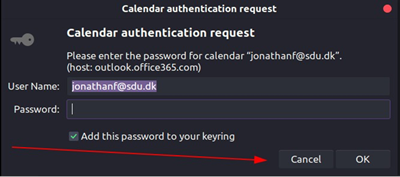
If Evolution Calendar pops up and asks for a password click CANCEL. Evolution will sometime crash during this step. Please close it (process kill if completely stuck). Please reopen Evolution if this occurs.
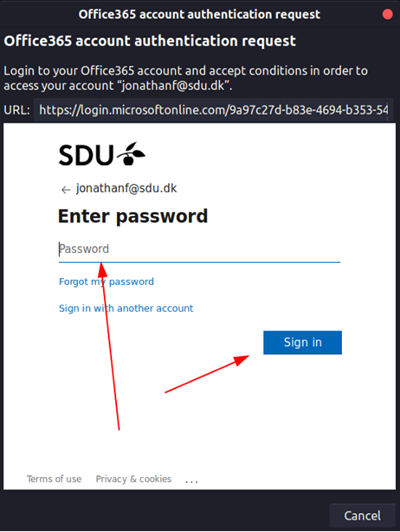
Sooner or later a Office365 pop up will appear asking you to login. Please type in your SDU password and “Sign in”. Afterwards mails should start appearing.
Enable Offline Global Address Catalog:
Open Evolution Preferences from the “edit” top tab (shift +ctrl + s).
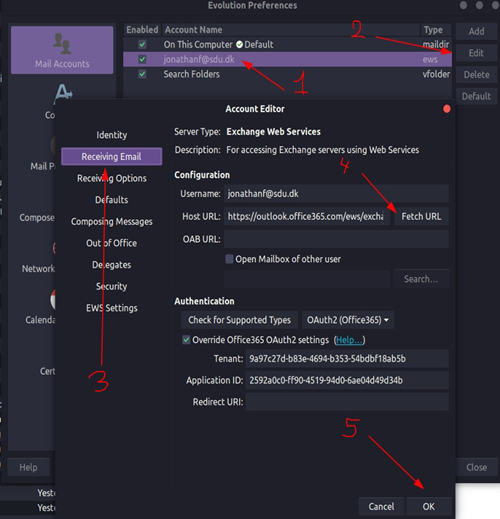
Mark by clicking your SDU account fomr the “Mail Accounts” menu. When selected click “Edit” to edit the account.
The “Account Editor” window will appear. Choose “Receiving Email”
Click “Fetch URL” and OK when done.
Make your SDU mailbox and calendar the default
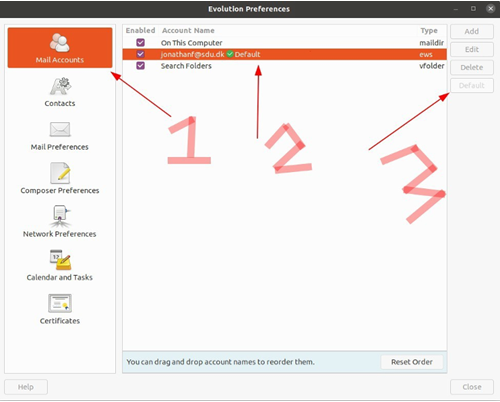
Open Evolution Preferences: Edit → Preferences (shift + ctrl + s)
From the tab “Mail Accounts”- Mark your SDU mail by clicking on it. When marked choose “Default” from the left panel to make this your default mailbox.
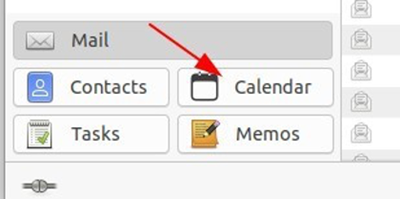
Open your calendar in Evolution
Right click on your SDU calendar and choose “Properties”. The calendar properties windows will now appear. Choose “Mark as default calendar” and OK when done.

Create a signature
1. Open Evolution Preferences: Edit → Preferences (shift + ctrl + s)
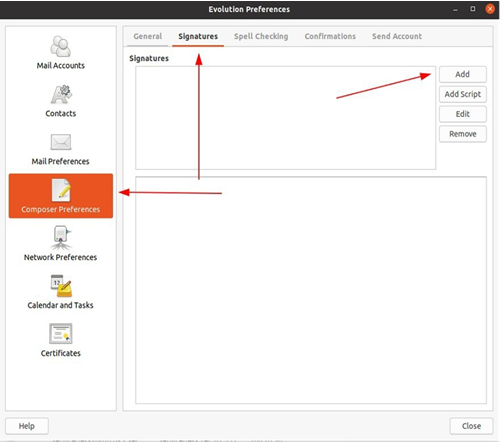
2. Select the “Composer Preferences” from the left row.
3. Choose “Signatures” from the top panel menu.
4. Choose “Add” from the left panel to add a signature
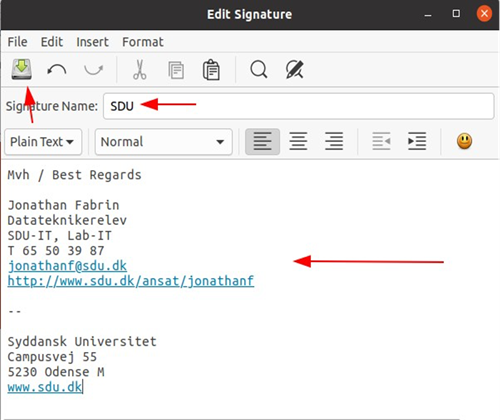
5. Give the signature a name → ex. SDU
6. Create the signature. You will need to create your own signature or copy one from a previous mail.
7. Save the signature
8. Open Evolution Preferences: Edit → Preferences (shift + ctrl + s)
9. Choose “Mail Accounts” from the left panel menu.
10. Highlight your SDU account and choose “Edit” from the right panel menu.
11. From the “Account Editor” windows choose Identity from the left menu.
12. Choose your newly created signature from the drop down menu.
13. When done click “OK”. Your signature is now applied
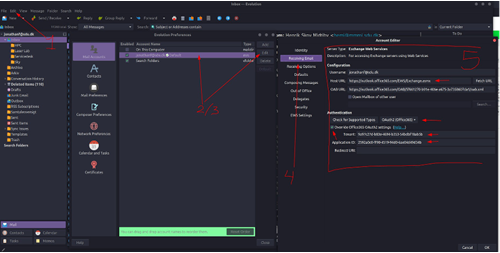
Configure already setup Evolution with Office365
Open Evolution Preferences (Edit → Preferences).
From the Evolution Preferences window please highlight your account and select Edit from the left menu.
From the Account Editor window select “Receiving Email” from the left menu. Please append the following information is the respective fields:
• Host URL → https://outlook.office365.com/ews/exchange.asmx
• Authentication type → OAuth2(Office365)
• Override Office365 OAuth2 settings → √
• Tenant → 9a97c27d-b83e-4694-b353-54bdbf18ab5b
• Application ID → 2592a0c0-ff90-4519-94d0-6ae04d49d34b
• Redirect URI → Leave blank
A Office portal login window should appear asking for your SDU credentials (You might need to restart Evolution to make it appear).
Please login.
Please enable the Offline Global Access Catalog. Please see the description earlier in the guide.
Sidst opdateret: 02.02.2024